

A First Attempt
Something I don't get much chance to do within Moulage is developing ideas. The fast-paced nature of the work I do means that the wounds that I create tend to be built up directly onto a model, more often than not this is someone I have only met this morning and am unlikely to meet again. This means that the looks that I create tend to be built up on the day, or are standardized prosthetics pieces rather than looks that have been customized for the person and developed over time.
I have enough experience with using my kit and creating wounds of all shapes and sizes that I can easily create convincing makeups without this development stage however there are always things that I wish I'd have done differently whether that be the placement, application or anything else.
That is why for the next few weeks I want to explore creating the same injury a few times over, changing different things each week to create a series of the same injury which will then hopefully improve each week.
I have reference images for the wound I am basing these makeups on and I have images of this wound before and after suturing which gives me a few options to work from.
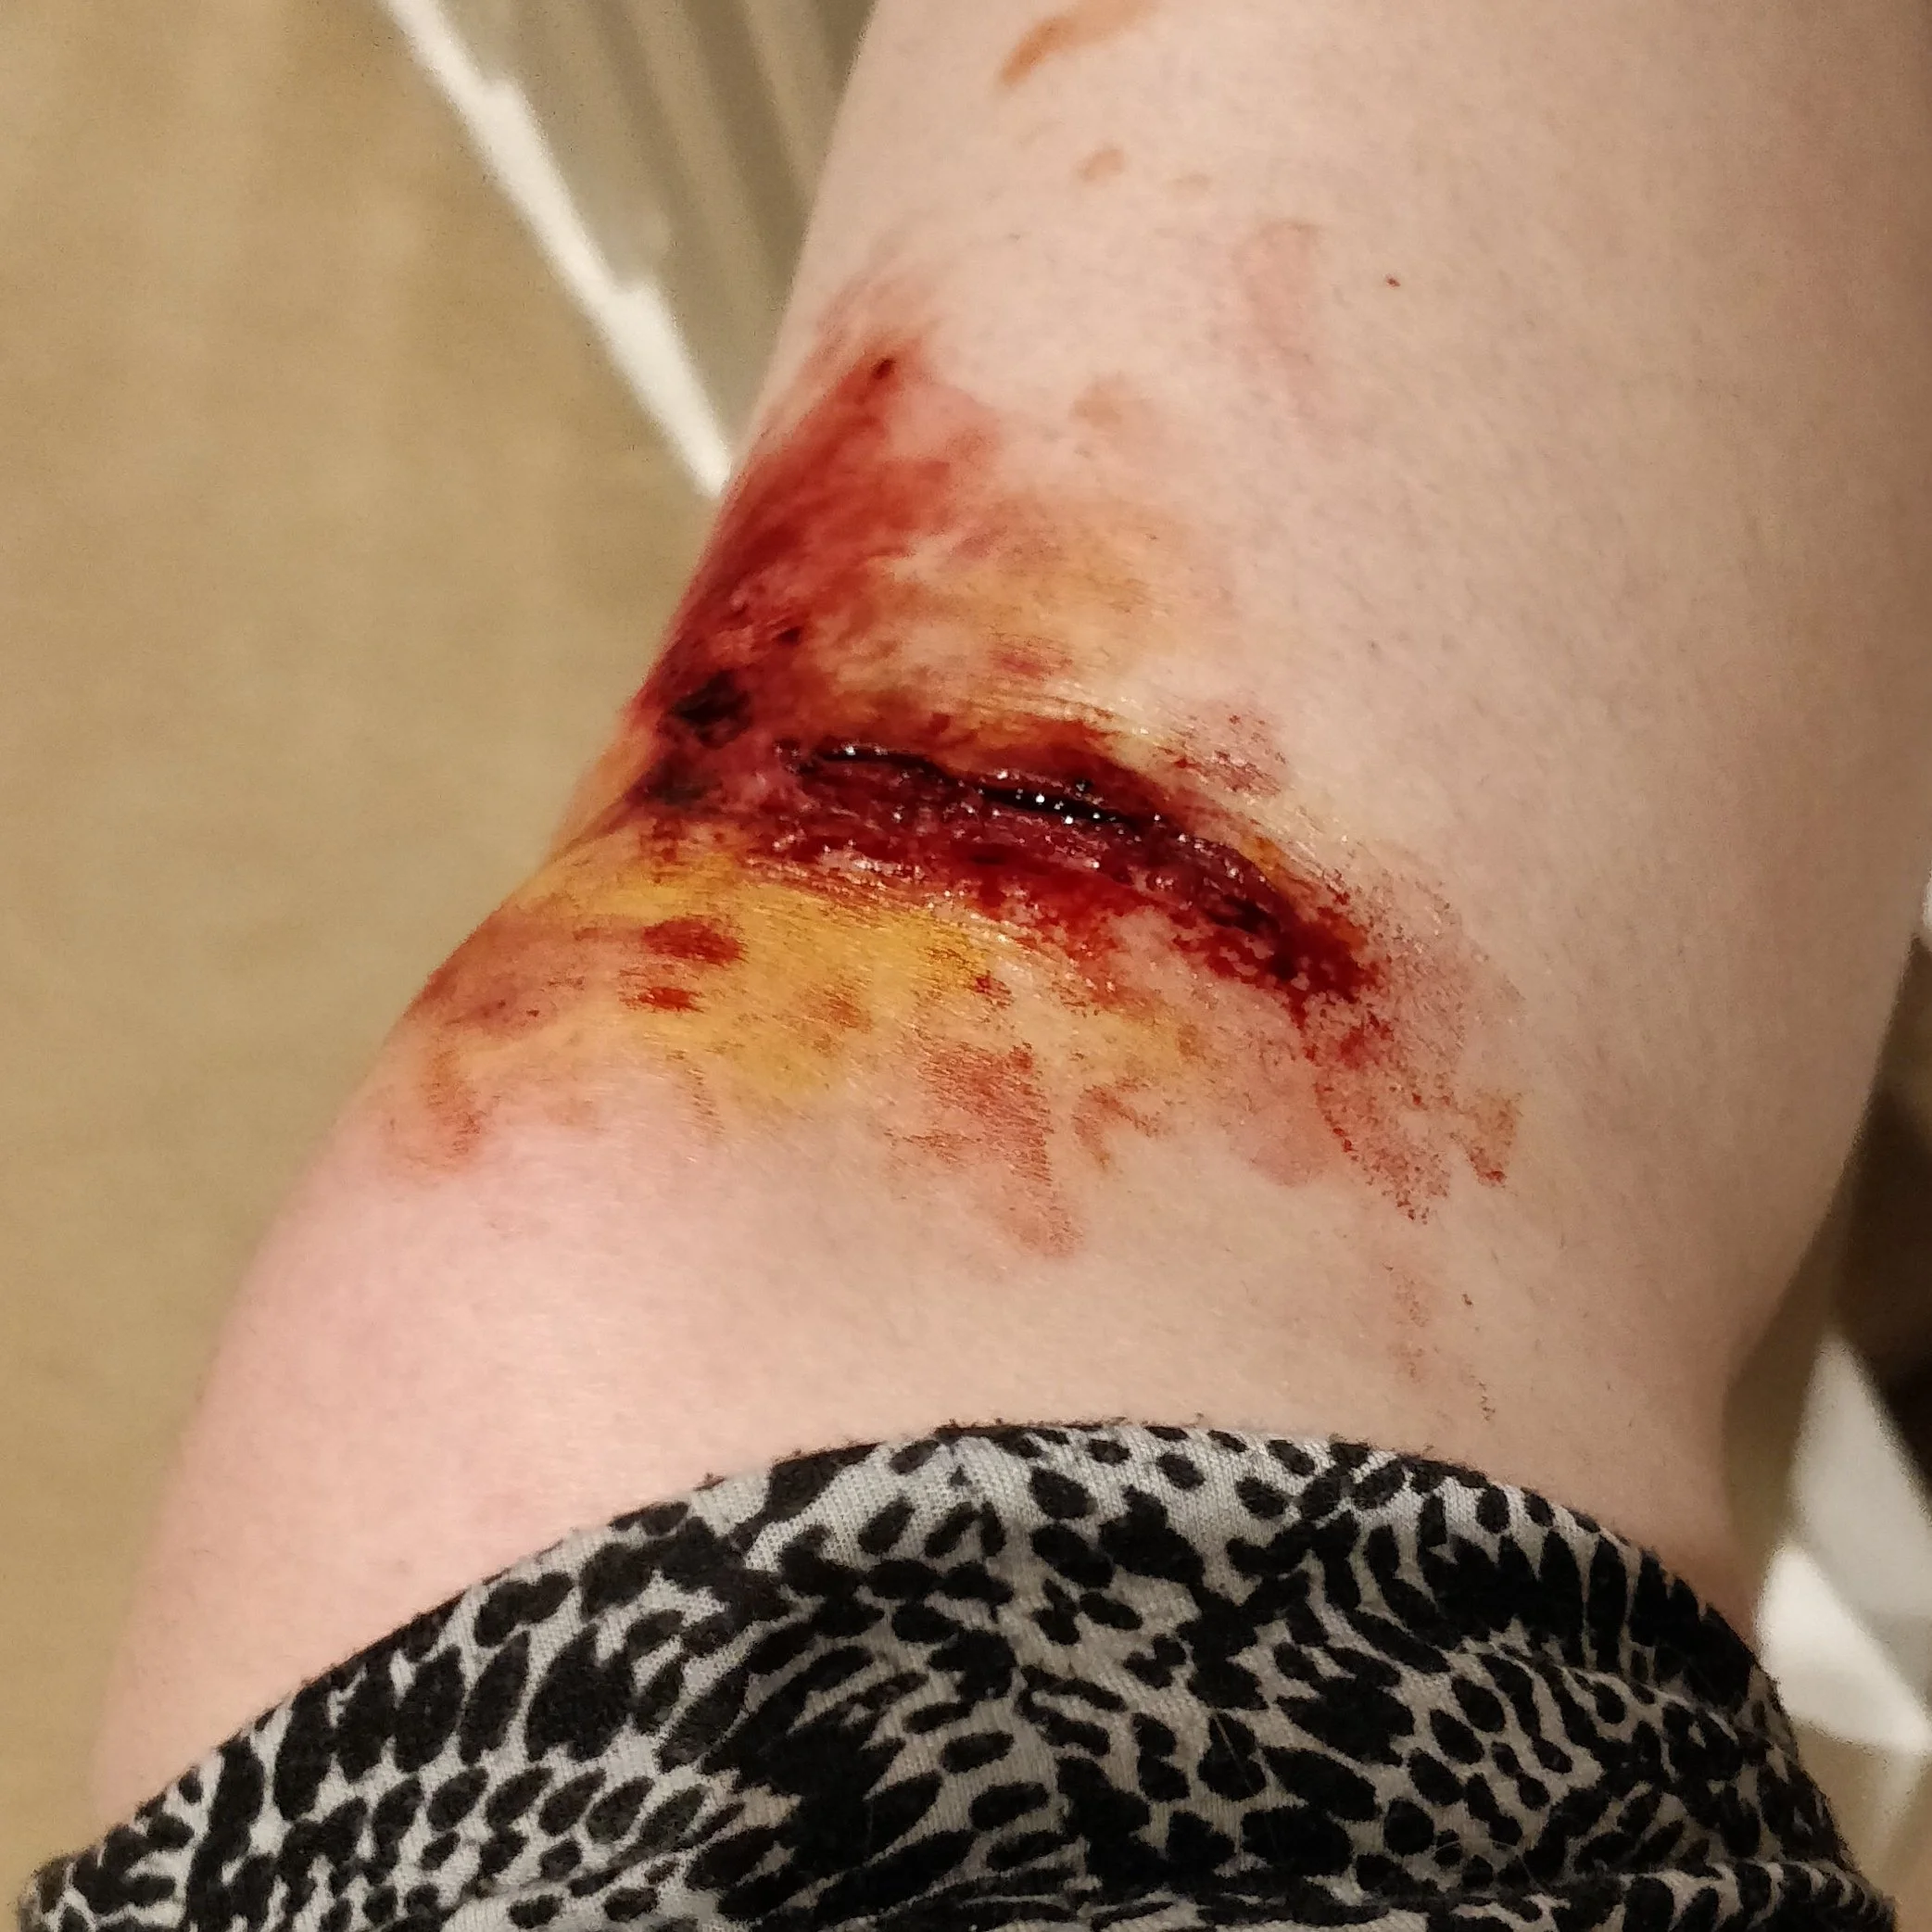
For this first attempt I built up silicone on my knee and carved out the rough shape I wanted. This is the first bit that I feel could be changed. I want the wound to appear deeper than it does currently, with the skin appearing to peel away more. I think I was a little too tentative when applying my silicone and could get away with using a far thicker layer than I did this time. If I increase the amount of silicone on the skin I will also put more focus on adding the skin texture back into the silicone as I think that the smoothness of the product will be more obvious when there is more applied.
I would also like to alter the positioning of the wound as I feel I applied it higher than I was aiming for. I would like to apply it more below the kneecap next time. This might be easier if I was applying the makeup on someone else as the angle required to apply makeup below your own knee can be quite uncomfortable!
I am pretty happy with the colouring however I might experiment with a deeper orange/yellow colour to imitate the iodine next time as I feel that it was slightly too bright. I may even try using real iodine for ease although I have never done this so I am unsure how it will react with the silicone. This isn’t something that I feel is essential to change however I am interested to see how different products look as I used my skin illustrator palette this time which I am very familiar with.

I would also like to add some darker colours into the wound to add a bit more depth as I think that is what this would be lacking overall. I will experiment with doing this using different colours and textures of blood as well as using cream and alcohol activated colours in dark reds and purples to give the illusion of depth. I will avoid using black for this purpose as I do not feel that it looks natural however I may add some black under the flaps of skin and around the edges to make it appear slightly dirty. I did use this technique this time however it got a little lost with the other colours and the blood.
I plan to do this wound again for next week’s Moulage Monday and see if I can get a better result by following my critiques from this week's work.
Hopefully, by the end of this series, I will have a fully developed collection of the same wound using different techniques and will be able to analyse which I like best and why.
If you want to join me on this journey then follow me on social media to keep updated with what I am doing and get notified when I post a new blog post.
Thank you for reading and I hope you have a creative week 😊


