
I was recently asked to attend a major incident day as a makeup artist. For this we needed to apply a range of different trauma simulation makeups including this open tibia fracture. I was really excited about this application as due to most of the work I do being beginners workshops in which we use mostly products that can be built up directly on to the skin, I do not often get the opportunity to apply prosthetics pieces of this size anymore.

The scenario was an explosion. The patient that sustained this compound tibia fracture also had burns on their face and across their abdomen but my main focus at the beginning was getting that prosthetic piece attached so that we could colour and dress it when we had a spare moment between applications.
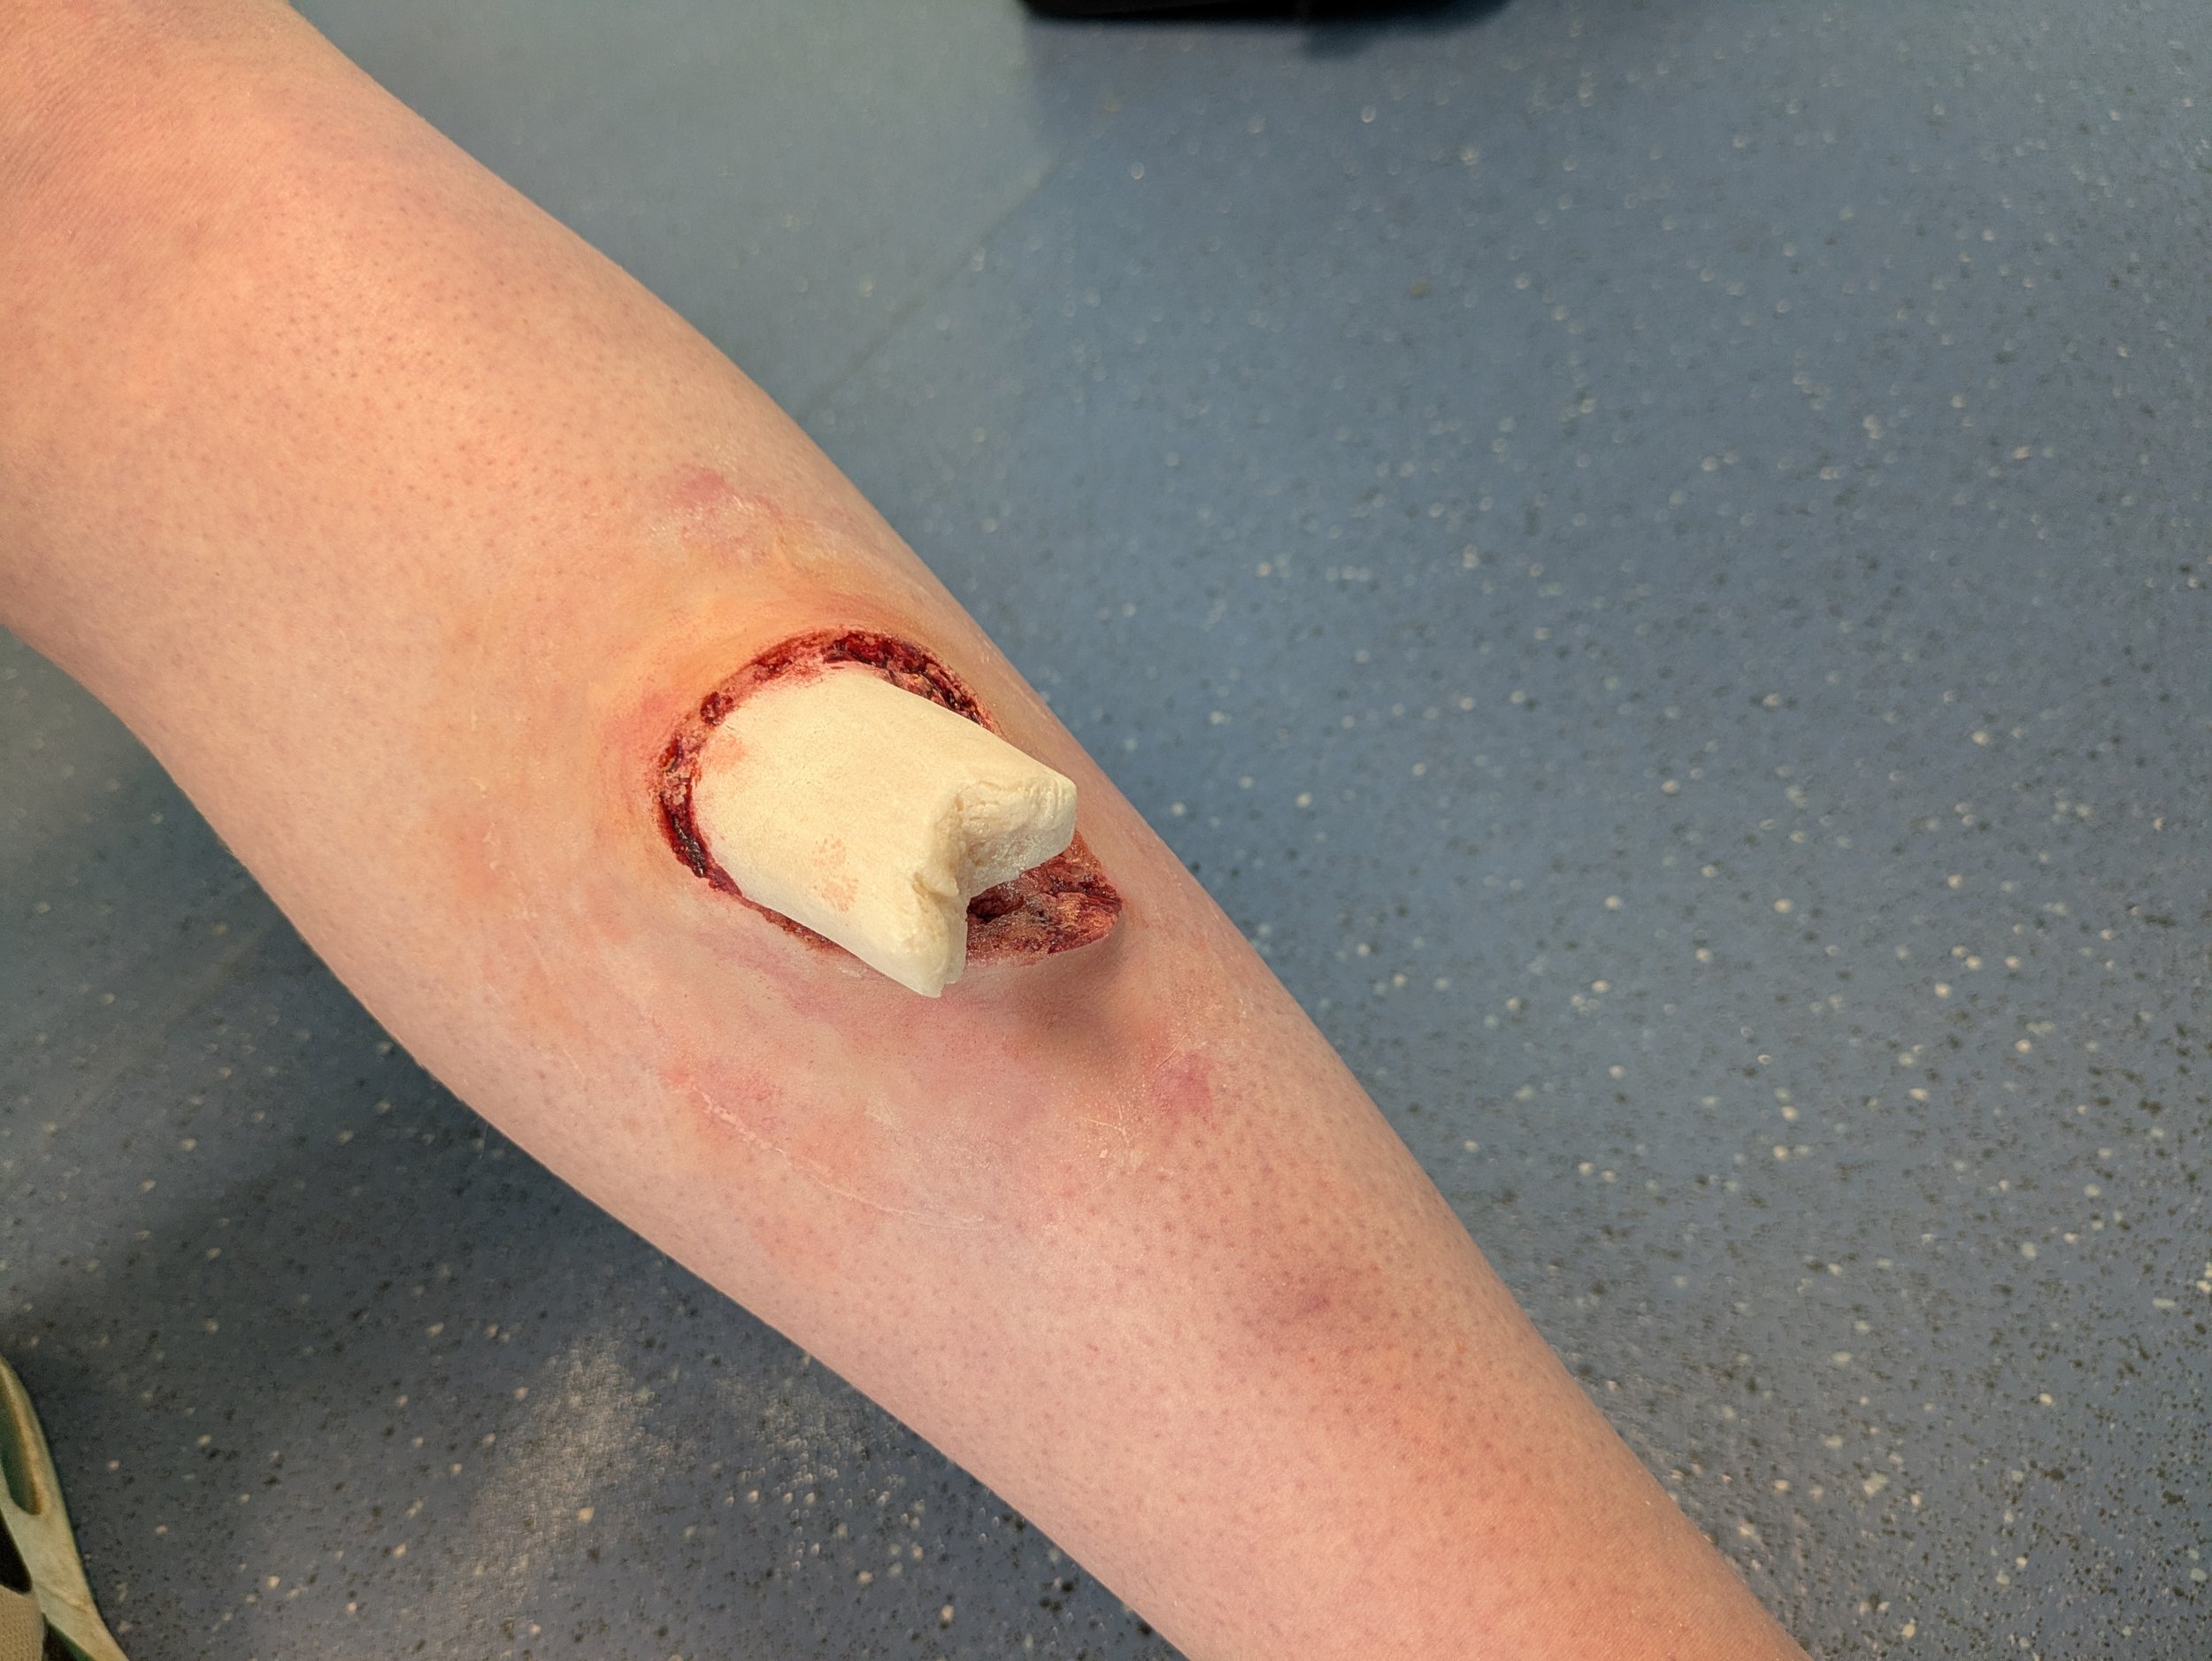
Due to time constraints I decided to purchase a pre-made encapsulated silicone prosthetic piece instead of making it from scratch. In looking for suitable pieces, I found an appliance from JessFX that was exactly what I was looking for. This piece arrived un-coloured and I pre-coloured it prior to the day to save time. I used Skin illustrator colours, mostly from the on set FX palette with Isopropyl alcohol to activate the colours. The colours sat really well on the piece. These appliances are blended using acetone. This means that they do not have any issues with the IPA disrupting the surface. The piece was lovely and soft and also a dream to apply

When it came to application day I used pros-aide to glue the piece to the skin. Due to the price point of other prosthetics glues this tends to be my first choice. It definitely has its drawbacks - for me the main one is removal- but overall it does the job it needs to do well and once that appliance is glued to the skin it is not going anywhere unless you make it!
Once the piece was glued to the skin it came down to colouring and dressing. Due to the work I had done previously painting the piece I did not have to worry too much about colour. I did add a very small amount of colour to blend the skin tone a little more into the models again using a Skin Illustrator palette and I also went back into the main wounds to add a little more depth and then came blood.
I started off using Ben Nye Thick Blood and placing it with a spatula into the wound including under the bone. As this piece is made from silicone, this allows for a lot of flex in the piece. This is fantastic when it comes to colouring and adding blood under the bone as you can just move it out the way. This did make for some amusing moments of my model flinching when I did just that and then saying ‘oh wait, it's not my bone!’

After I was finished adding thick blood it was time to move on to runny blood. For this I used the Kryolan Supreme Blood. Whenever I am teaching a workshop, one of the things I always say is ‘don’t be scared to add blood, people bleed’ and honestly I wish I had followed my own advice. My biggest regret with this piece is that I did not add more blood as I got caught up in not wanting to ruin the work I had already done. Don’t get me wrong, I am incredibly happy with how it turned out but the only thing i can think when I look back on photos of the look now is that a wound that size would have been bleeding way more! This is the point where you have to make the choice between the makeup artist in you that wants to keep the blood to a minimum so you can show off the work you've done inside the wound, and the person who does moulage and is aiming purely for the most realistic effect possible. This time, I made the wrong choice!

Overall I am really pleased with how this makeup worked out and I think that the day overall was really successful. I can’t wait until the next time I have the opportunity to apply a piece this size.

If you are interested in seeing what else went on at the major incident day, have a look at this video of the event!
